Star Cookies are a fun and festive treat that look beautiful on any dessert table. With tender Italian style sugar cookies, smooth light blue royal icing, and colorful sprinkles, these cookies bring charm to every celebration.
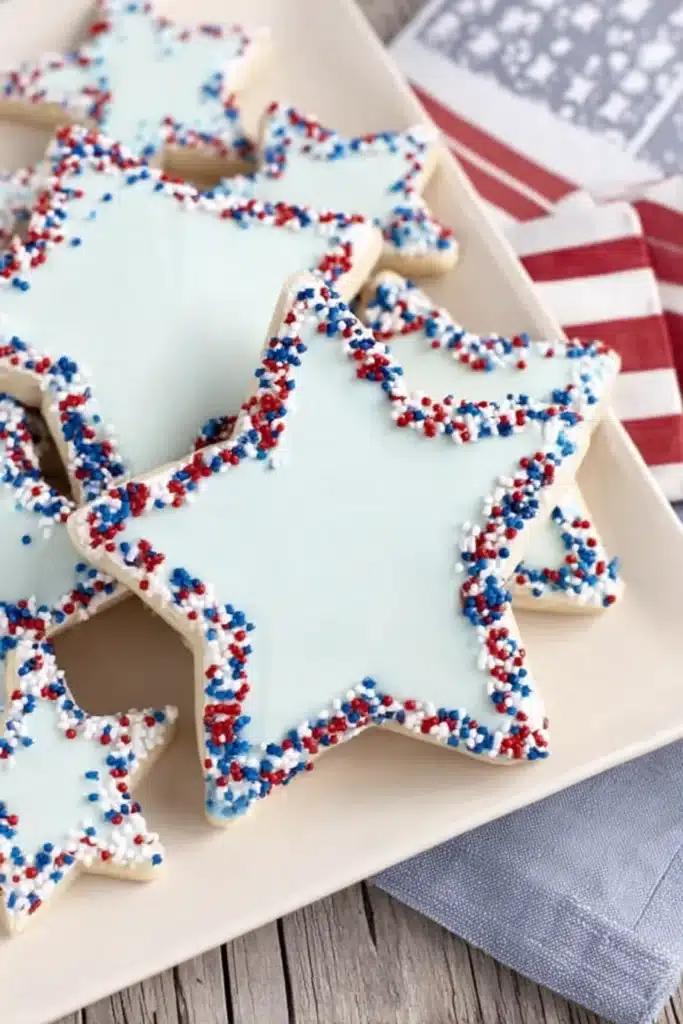
Table of Contents
Why You’ll Love These Star Cookies
These Star Cookies look impressive, yet the decorating process is simple and enjoyable.
The Italian style sugar cookie dough bakes evenly, so the cookies keep their crisp star shape. Meanwhile, the texture stays tender and delicious inside.
You can make small cookies for party trays or oversized stars for personalized gifts. In addition, the red, white, and blue sprinkle edges add a festive touch that works for many occasions.
What Are Star Cookies?
Star Cookies are decorated sugar cookies cut into star shapes and finished with royal icing and colorful sprinkles.
They work well for holidays, birthdays, baby showers, and summer celebrations. Because they hold their shape beautifully, they are also ideal for detailed decorating.
Italian Style Sugar Cookies for Decorating
These cookies use an Italian style sugar cookie dough that creates smooth edges and an even bake.
As a result, the cookies stay sturdy enough for decorating while remaining pleasantly soft and tender when eaten.
Perfect for Holidays, Parties, and Special Celebrations
Star Cookies fit almost any celebration.
Whether you are hosting a baby shower, planning a birthday party, or celebrating the Fourth of July, these cookies add a cheerful homemade touch. Furthermore, large cookies can include personalized messages.
Ingredients You’ll Need
Italian Cookie Dough
Italian cookie dough forms the base of these Star Cookies.
It creates a sweet flavor, a tender texture, and clean edges that make decorating easier.
Light Blue Royal Icing
Light blue royal icing gives the cookies their smooth decorative finish.
Once dry, it creates the perfect surface for adding borders and personalized details.
Red, White, and Blue Nonpareil Sprinkles
These tiny sprinkles add color, texture, and festive appeal.
They also create the signature decorative border around each cookie.
Optional Edible Food Markers for Personalization
Edible food markers allow you to write names, greetings, or special messages.
They work especially well on oversized Star Cookies once the icing has fully dried.
Essential Tools and Supplies
Star Cookie Cutters and Printable Star Template
Star shaped cookie cutters make the process quick and easy.
However, if you want giant cookies, a printable star template works just as well. You can even turn it into a reusable plastic template.
Rolling Pin and Baking Sheets
A rolling pin helps create even cookie thickness.
Meanwhile, baking sheets provide a stable surface for consistent baking.
Piping Bags and Decorating Tools
Piping bags help create neat outlines and smooth icing coverage.
They also make it easier to apply decorative borders around each cookie.
How to Make Star Cookies
Prepare and Roll the Cookie Dough
Prepare your Italian cookie dough according to your preferred recipe.
Then roll smaller cookies to about 1/4 inch thickness. For oversized Star Cookies, roll the dough to about 3/8 inch thickness.
Cut Small and Large Star Shapes
Use star cookie cutters or a printable star template.
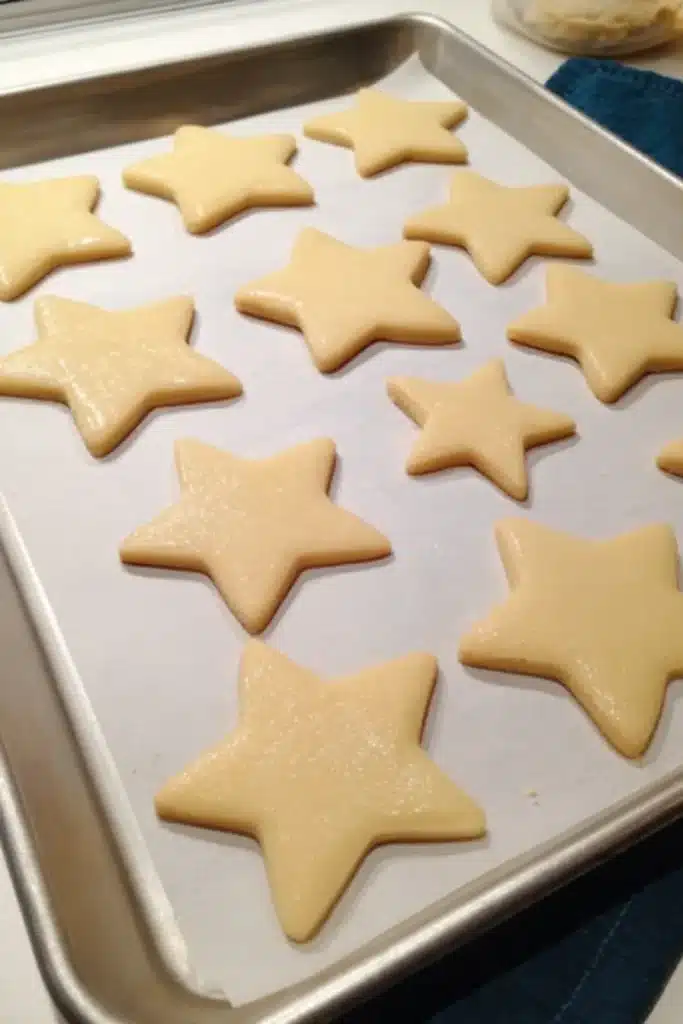
Next, carefully cut out the shapes and transfer them to prepared baking sheets.
Bake and Cool the Cookies Completely
Bake the cookies until fully cooked.
Afterward, allow them to cool completely before decorating. This step helps the icing set properly.
Pipe and Flood with Royal Icing
Pipe an outline around each cookie.
Then flood the center with light blue royal icing until the surface appears smooth and even.

Let the Base Icing Dry
Allow the flooded icing layer to dry completely.
This step is important because adding decorations too early can damage the finish.
Add the Decorative Sprinkle Edges
Pipe a fresh border around the cookie edge.
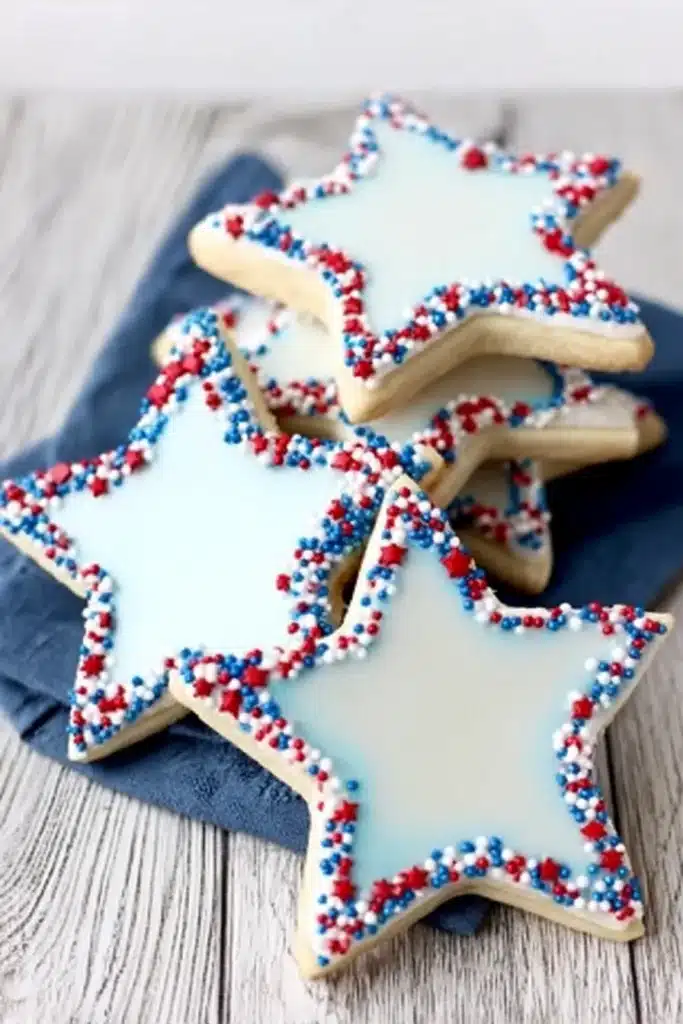
Immediately dip the edge into red, white, and blue nonpareil sprinkles using a shallow dish. As a result, the sprinkles stick neatly to the fresh icing.
Allow the Cookies to Dry Before Serving
Let the decorated Star Cookies dry thoroughly.
Only stack or package them once the icing has completely hardened.
How to Decorate Star Cookies Like a Pro
Creating Smooth Flooded Icing
Use icing with a consistency that spreads easily but does not run off the cookie.
Then gently tap the cookie on the counter to release air bubbles and smooth the surface.
Applying Nonpareil Sprinkles Around the Edges
Work on one cookie at a time.
Because the border icing dries quickly, add the sprinkles immediately after piping the outline.
Writing Personalized Messages on Large Cookies
Wait until the icing is completely dry.
Then use edible food markers to add names, holiday greetings, or special messages.
Tips for Perfect Star Cookies
Choosing the Right Dough Thickness
Smaller Star Cookies work best at about 1/4 inch thickness.
Meanwhile, oversized cookies need thicker dough for extra support and stability.
Preventing Icing Smudges and Cracks
Always allow each icing layer to dry fully before adding more decorations.
In addition, avoid moving the cookies while the icing is setting.
Getting Clean Sprinkle Borders
Use a shallow dish filled with nonpareils.
Then gently press the freshly outlined cookie edge into the sprinkles for a clean border.
Best Drying Practices Before Stacking
Leave the cookies uncovered at room temperature.
After the icing hardens completely, you can safely stack them without damaging the decorations.
Making Giant Star Cookies with a Printable Template
Creating a Reusable Flexible Plastic Template
Print a star pattern and place it beneath a flexible plastic sheet.
Then trace and cut the shape to create a reusable template for future batches.
Why Thicker Dough Works Best for Oversized Cookies
Large cookies need more structure.
Therefore, rolling the dough thicker helps prevent breakage and keeps the shape stable during decorating.
Serving Ideas for Every Celebration
Baby Showers and Birthday Parties
Personalized Star Cookies make wonderful party favors.
You can write guest names or special messages for a memorable touch.
Fourth of July and Memorial Day Gatherings
The red, white, and blue sprinkle border makes these Star Cookies especially fitting for patriotic celebrations.
They also pair perfectly with other festive desserts.
Veterans Day, Labor Day, and Summer Events
These cookies bring bright color and homemade charm to cookouts, picnics, and community gatherings.
As a result, they often become a conversation piece on the dessert table.
Storage and Make Ahead Instructions
How to Store Decorated Cookies
Store Star Cookies in an airtight container at room temperature.
They typically stay fresh for several days when properly stored.
Freezing and Preparing in Advance
You can freeze undecorated cookies after baking.
Then thaw them completely before decorating. This approach helps save time before a party or holiday.
Common Mistakes to Avoid
Decorating Before the Icing Sets
Many decorators rush this step.
However, allowing the base icing to dry fully helps create a cleaner and more professional appearance.
Stacking Cookies Too Soon
Even if the cookies look dry, the icing may still be soft underneath.
Therefore, allow extra drying time before stacking.
Using Dough That Is Too Thin for Large Shapes
Thin dough can crack or bend.
Instead, use thicker dough for large Star Cookies to maintain stability.
Frequently Asked Questions
Can I Make Star Cookies Ahead of Time?
Yes. You can bake the cookies several days ahead and decorate them later. You can also freeze undecorated cookies for longer storage.
How Long Does Royal Icing Need to Dry?
Drying time depends on humidity and icing thickness. Generally, allow several hours for the base layer and overnight drying for fully decorated cookies.
Can I Use Different Sprinkle Colors?
Absolutely. While red, white, and blue are perfect for patriotic events, you can match the sprinkles to any party theme.
What Is the Best Way to Personalize Large Star Cookies?
Use edible food markers after the icing has completely dried. This method creates clear and attractive lettering.
Can I Make These Cookies Without a Star Cutter?
Yes. A printable star template works very well, especially for oversized Star Cookies.
Other Recipes You May Enjoy
- Easy decorated sugar cookies for holiday celebrations
- Best royal icing decorating tips for homemade cookies
- Creative party dessert ideas for birthdays and baby showers
- How to make colorful frosting for festive cookie designs
- Simple homemade cookie recipes with decorative toppings
- Patriotic red white and blue dessert treats for celebrations
Final Thoughts
These Star Cookies combine classic flavor with eye catching decorations. They are easy to customize and always make a festive addition to any celebration.
For even more dessert inspiration and decorating ideas, visit the Pinterest collection at pinterest.
Why These Decorated Star Cookies Are Always a Crowd Favorite
Star Cookies stand out because they are beautiful, versatile, and delicious.
The tender Italian style cookie base, smooth royal icing, and colorful sprinkle border create a treat that looks as good as it tastes. Whether you make them for a birthday, baby shower, holiday, or summer gathering, these cookies always bring smiles to the table.
Star Cookies

Equipment
- Star cookie cutters Use various sizes or a printable template for giant cookies
- Rolling Pin For rolling dough evenly
- Baking sheets For baking cookies
- Piping bags For outlining and flooding with royal icing
- Shallow dish For dipping cookie edges into sprinkles
- Printable star template Optional for oversized cookies
- Edible food markers Optional for personalization
Ingredients
- Italian style sugar cookie dough
- Light blue royal icing
- Red, white, and blue nonpareil sprinkles
- Edible food markers for personalization (optional)
Instructions
- Prepare the Italian style sugar cookie dough. Roll smaller cookies to about 1/4 inch thickness and large cookies to about 3/8 inch thickness.
- Cut star shapes using cookie cutters or a printable star template for oversized cookies.
- Bake the cookies until done. Allow them to cool completely before decorating.
- Pipe and flood each cookie with light blue royal icing.
- Allow the base icing layer to dry completely before continuing.
- Pipe a fresh outline around the cookie edges and immediately dip the edges into red, white, and blue nonpareil sprinkles using a shallow dish.
- For oversized cookies, write names or messages with edible food markers after the icing has set.
- Allow the decorated cookies to dry completely before stacking, packaging, or serving.