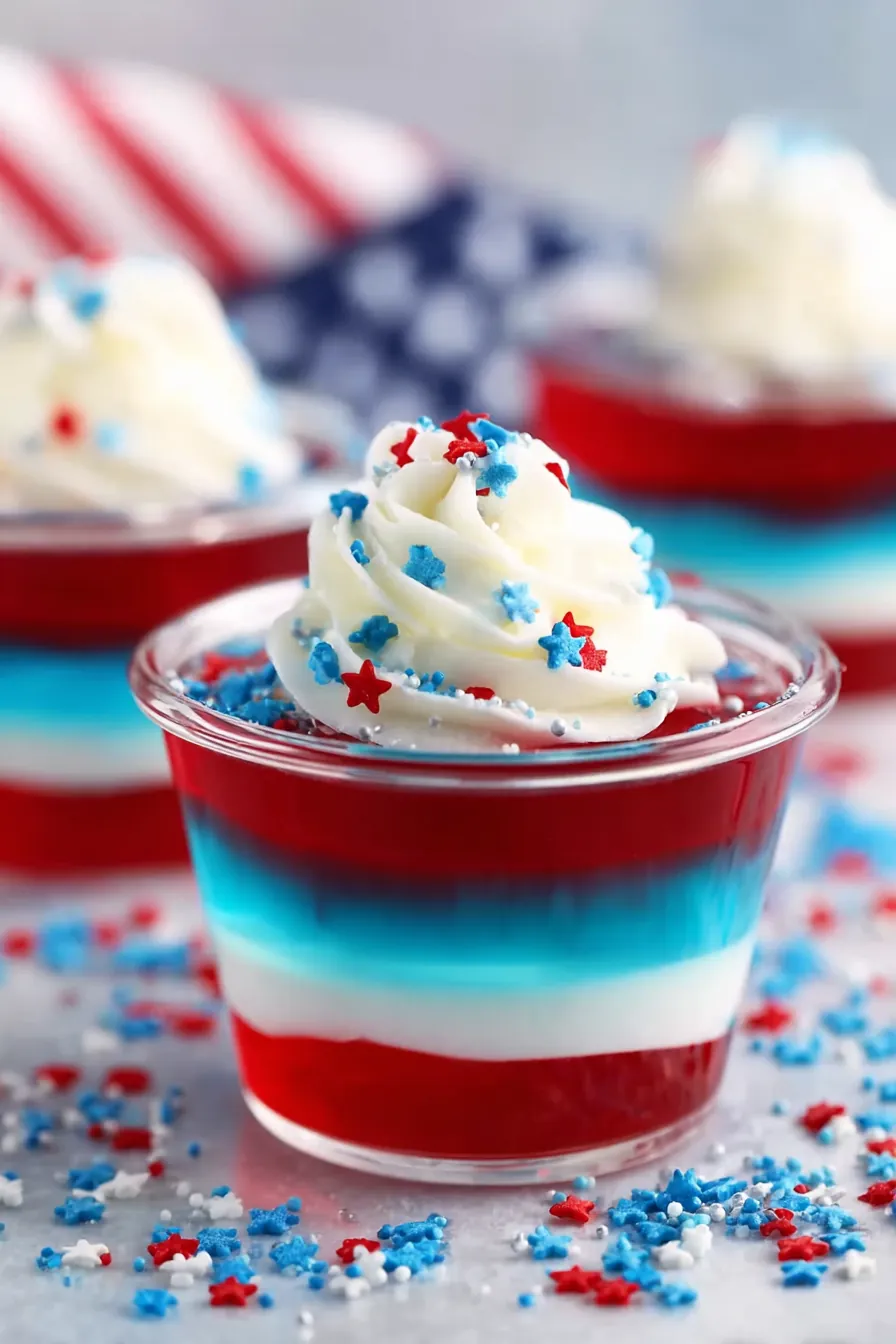
These 4th of July Cake Pops are the perfect festive dessert for your holiday celebration. They feature a soft, moist cake center, a sweet chocolate shell, and colorful red, white, and blue sprinkles that make every bite feel extra special.

Table of Contents
Why These 4th of July Cake Pops Are Perfect for Your Celebration
Festive Red, White, and Blue Dessert for Independence Day
Nothing says Independence Day quite like red, white, and blue treats. These 4th of July Cake Pops bring patriotic color to your dessert table while also delivering a sweet and creamy flavor everyone loves.
Because they are individually portioned, guests can easily grab one and enjoy it while mingling. As a result, they work wonderfully for outdoor celebrations and backyard parties.
Easy Cake Pop Recipe for Beginners
If you’ve never made cake pops before, this recipe is a great place to start. The steps are simple, and the ingredients are easy to find.
Moreover, using a boxed cake mix saves time while still creating delicious results. Even beginners can make beautiful 4th of July Cake Pops with confidence.
Great for Parties, BBQs, and Family Gatherings
These cake pops travel well and look impressive on any dessert display. Meanwhile, kids love the colorful sprinkles and fun presentation.
Whether you’re hosting a family cookout or attending a neighborhood BBQ, these 4th of July Cake Pops fit right in.
Ingredients for 4th of July Cake Pops
Cake Pop Base Ingredients
White cake mix creates the soft and fluffy cake base.
White frosting helps bind the cake crumbs together into a dough like consistency.
Chocolate Coating and Decorations
White chocolate chips create the smooth outer shell.
Red, white, and blue sprinkles add color, crunch, and a patriotic finish.
Recommended Equipment and Supplies
You’ll need a mixing bowl, baking pan, wax paper, microwave safe bowl, tray, and wooden skewers or lollipop sticks.
Additionally, a cooling rack can make decorating easier.
How to Make 4th of July Cake Pops
Bake and Cool the Cake
Prepare the cake according to the package directions.
Then bake until done and allow it to cool completely before moving to the next step.
Crumble the Cake and Mix with Frosting
Place the cooled cake into a large bowl and crumble it into fine crumbs.
Next, mix in the frosting until the mixture resembles soft dough and holds together when pressed.
Shape the Cake Balls
Roll the mixture into small 1 inch balls.
Afterward, place them on a wax paper lined tray.

Insert the Sticks and Chill
Melt a small amount of white chocolate.
Dip the end of each stick into the melted chocolate and insert it halfway into a cake ball.
Then refrigerate for about 1 hour until firm.

Melt the Chocolate Coating
Place the remaining white chocolate in a microwave safe bowl.
Heat gently until smooth, stirring frequently to prevent overheating.

Dip and Decorate the Cake Pops
Remove the chilled cake pops from the refrigerator.
Dip each cake pop into the melted chocolate, then allow any excess coating to drip off.
Immediately add the red, white, and blue sprinkles while the coating remains wet.

Chill Until Fully Set
Return the decorated cake pops to the lined tray.
Then chill until the chocolate coating becomes firm and fully set.
Expert Tips for Smooth and Sturdy Cake Pops
How to Prevent Cake Pops from Falling Off the Stick
Always dip the stick into melted chocolate before inserting it into the cake ball.
This simple step creates a stronger connection and helps keep the cake pops secure.
The Best Way to Achieve a Smooth Chocolate Coating
Use fully melted chocolate with a smooth consistency.
Also, dip each cake pop in one steady motion and gently tap away excess coating.
How to Avoid Cracks in the Chocolate Shell
Very cold cake pops can sometimes crack when dipped into warm chocolate.
Therefore, let them sit at room temperature for a few minutes before coating if cracking becomes an issue.
Common Cake Pop Mistakes and How to Fix Them
If the mixture feels too dry, add a little more frosting.
If it feels too wet, mix in additional cake crumbs.
Meanwhile, if the chocolate thickens during decorating, gently reheat it until smooth again.
Variations and Ingredient Substitutions
Alternative Cake Mix Flavors
Although white cake works beautifully, you can also use yellow cake, chocolate cake, lemon cake, funfetti cake, or red velvet cake.
Each option creates a unique twist on classic 4th of July Cake Pops.
Frosting Swaps for Different Flavors
White frosting works well, but buttercream frosting also adds richness.
Additionally, cream cheese frosting creates a slightly tangy flavor profile.
White, Milk, and Dark Chocolate Coating Options
White chocolate provides the classic patriotic look.
However, milk chocolate or dark chocolate offer delicious alternatives if you prefer a richer taste.
Creative Patriotic Decorating Ideas
Try edible stars, colored sugar crystals, or themed candy decorations.
You can also drizzle red and blue chocolate over the white coating for extra flair.
Make Ahead and Party Planning Tips
Preparing Cake Pops in Advance
These 4th of July Cake Pops are excellent for advance preparation.
In fact, making them a day or two before your event can reduce holiday stress.
Best Decorating Timeline for Events
Decorate the cake pops one day before serving for the freshest appearance.
Then store them in the refrigerator until party time.
Serving Suggestions for 4th of July Celebrations
Arrange the cake pops in a decorative stand or festive container.
Additionally, pair them with fresh fruit, cookies, and other patriotic desserts for a complete dessert spread.
How to Store and Freeze Cake Pops
Refrigerator Storage Guidelines
Store the cake pops in an airtight container in the refrigerator.
They will stay fresh for up to 1 week.
Freezing Instructions for Longer Storage
Place the cake pops in an airtight freezer safe container.
Then freeze for up to 3 months.
Thawing for the Best Texture and Flavor
Transfer frozen cake pops to the refrigerator.
Allow them to thaw completely before serving for the best texture and flavor.
Frequently Asked Questions
Can I Make 4th of July Cake Pops Ahead of Time?
Yes. You can prepare them several days before your celebration and store them in the refrigerator until needed.
How Long Do Cake Pops Last?
When stored properly in an airtight container, they last up to 1 week in the refrigerator.
Why Are My Cake Pops Cracking?
Cracks usually happen when very cold cake pops meet warm chocolate. Therefore, let them sit briefly at room temperature before dipping.
Can I Use Different Sprinkles or Decorations?
Absolutely. Star sprinkles, colored sugars, and edible glitter all work well for festive decorating.
Do I Need Lollipop Sticks or Can I Use Skewers?
You can use either lollipop sticks or wooden skewers for this recipe.
Can I Freeze Decorated Cake Pops?
Yes. Freeze them in an airtight container for up to 3 months, then thaw in the refrigerator before serving.
Other Recipes You May Enjoy
- festive Patriotic Watermelon Fruit Salad for your 4th of July dessert table
- easy Star Cookies to pair with patriotic cake pops at holiday parties
- creamy Mini Cheesecake Cups for a fun red, white and blue dessert spread
- rich and crunchy Christmas Crack candy for holiday dessert platters
- quick no-bake Chocolate Chip Dip for serving alongside party treats
- healthy Apricot Bliss Balls for an easy bite-sized dessert alternative
Final Thoughts
Why This Easy Patriotic Dessert Belongs on Your Holiday Menu
These 4th of July Cake Pops combine festive colors, delicious flavor, and simple preparation in one fun dessert. Moreover, they are easy to customize and perfect for sharing. Whether you’re celebrating with family or friends, these patriotic treats will quickly become a holiday favorite.
For even more holiday dessert inspiration, visit my Pinterest page at pinterest.

4th of July Cake Pops
Equipment
- Mixing bowl For mixing cake crumbs and frosting
- Baking pan For baking the cake
- Wax paper To line the tray
- Tray For chilling cake pops
- Microwave-safe bowl For melting chocolate
- Wooden Skewers or Lollipop Sticks For assembling cake pops
Ingredients
- 1 box white cake mix, prepared according to package directions
- 2-3 tbsp white frosting
- 11 oz white chocolate chips
- 24 wooden skewers or lollipop sticks
- red, white, and blue sprinkles
Instructions
- Prepare and bake the cake according to the package directions. Allow the cake to cool completely.
- Crumble the cooled cake into fine crumbs. Mix in the frosting until the mixture holds together like soft dough.
- Shape the mixture into 1 inch balls and place them on a wax paper lined tray.
- Melt a small amount of white chocolate. Dip the end of each stick into the chocolate and insert it halfway into each cake ball. Refrigerate for about 1 hour until firm.
- Melt the remaining white chocolate until smooth.
- Dip each chilled cake ball into the melted chocolate. Allow excess coating to drip away.
- Immediately decorate with red, white, and blue sprinkles while the coating is still wet.
- Return the cake pops to the lined tray and chill until the coating is completely set. Serve and enjoy.