Craving a festive treat that’s both easy and irresistible? These Chocolate Covered Oreos are crunchy, creamy, and completely customizable. Perfect for gifting or decorating your holiday dessert table, they come together in minutes and look like bakery-worthy creations. With rich melted chocolate and colorful sprinkles, they’re the ultimate no-bake Christmas delight.

Table of Contents
Why You’ll Love These Chocolate Covered Oreos
You’ll love how simple and fun these Chocolate Covered Oreos are to make. There’s no baking, no fancy tools, and no stress — just creamy chocolate and that satisfying Oreo crunch. They’re ready in under 40 minutes, making them perfect for last-minute holiday treats or edible gifts. You can use white, milk, or dark chocolate to suit everyone’s taste, and festive sprinkles turn each one into a tiny edible ornament.
Also, these cookies store beautifully for up to four weeks, so you can make them ahead for parties, cookie swaps, or Christmas movie nights. Whether you’re crafting with kids or prepping for a big holiday platter, these treats always impress without taking much time or effort.
Ingredients You’ll Need
To make these delicious chocolate-covered Oreos, you’ll only need a few simple ingredients:
Oreo cookies, melting wafers (white and milk chocolate), and festive sprinkles. The Oreos give you that iconic crunch and creamy filling, while the melting wafers ensure a silky, smooth coating that hardens beautifully.
White chocolate adds a creamy sweetness and makes the colors pop, while milk or dark chocolate gives a rich, classic flavor. Finally, the sprinkles add crunch, color, and holiday cheer. You can switch them up for any celebration — red and green for Christmas, pastels for Easter, or gold and silver for New Year’s.
Ingredient Tips & Substitutions
You can use candy melts or high-quality chocolate bars instead of chocolate chips for a smoother coating. If you love variety, try different Oreo flavors like mint, golden, or red velvet for a fun twist. Add toppings like crushed pretzels, chopped nuts, or coconut for texture and flavor contrast.
For an elegant look, drizzle the set cookies with a swirl of contrasting chocolate or tinted white chocolate. You can even create marbled Oreos by swirling two melted chocolates together before dipping. To turn them into pops, insert lollipop sticks into the cream center before dipping — great for kids or dessert tables.
Tools & Equipment
All you need are two microwave-safe bowls, two forks, and parchment or wax paper. A small spatula can help with drizzling, and if you’re making Oreo pops, grab some lollipop or popsicle sticks. Everything else is optional, which keeps cleanup quick and easy — perfect for holiday baking with the family.
How to Make Chocolate Covered Oreos (Step-by-Step)
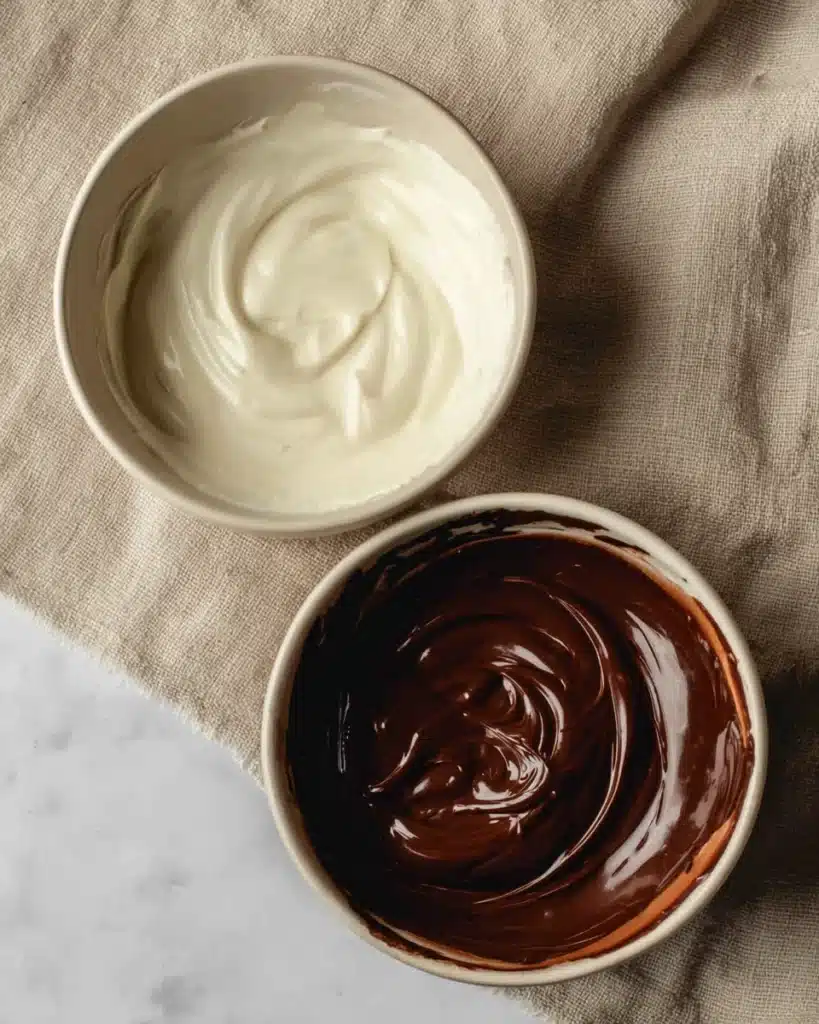
Melt the Chocolate
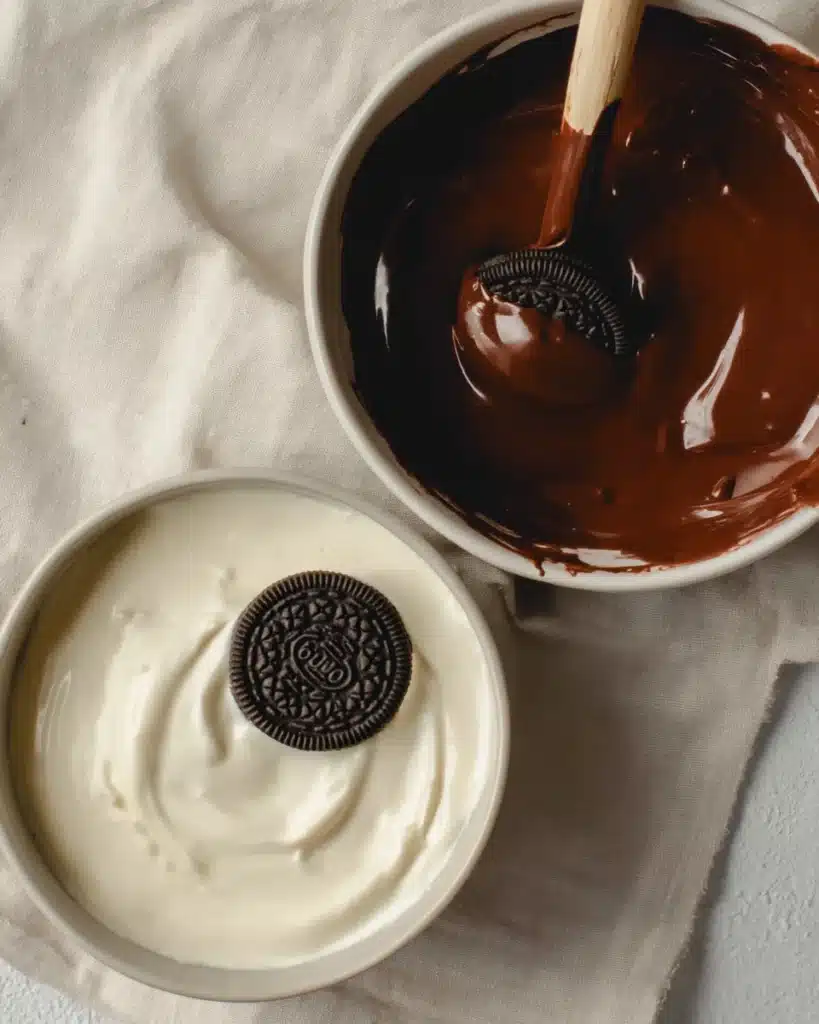
Place white and milk (or dark) chocolate melting wafers in separate microwave-safe bowls. Heat each in 30-second intervals, stirring after each one until smooth and glossy. Avoid overheating, as chocolate can seize. If it’s too thick, stir in a teaspoon of coconut oil for extra shine.
Dip and Coat the Oreos
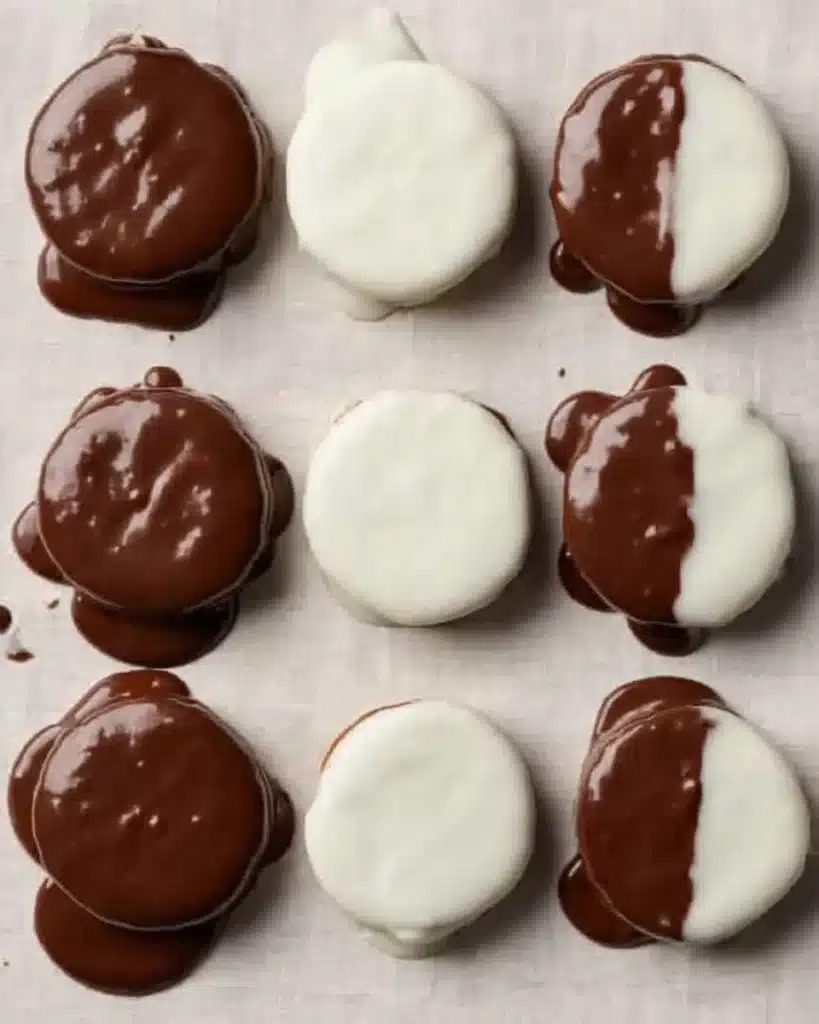
Drop one Oreo into the melted chocolate and use a fork to flip it, making sure it’s fully covered. Lift it out, gently tapping the fork on the bowl’s edge to remove excess chocolate. Carefully transfer the cookie onto wax or parchment paper. Repeat for all cookies, alternating chocolates if desired.
Decorate and Set
After dipping, let the cookies sit for a minute or two before decorating. Sprinkle immediately with holiday sprinkles or drizzle contrasting melted chocolate for a pretty finish. Allow them to set at room temperature for 20–30 minutes, or pop them into the fridge for 10–15 minutes to speed up the process.


Flavor Variations & Decoration Ideas
You can get creative with these Chocolate Covered Oreos in so many ways. Try marbled Oreos by swirling white and colored chocolate together before dipping. Add a drizzle of melted peanut butter for a salty-sweet combo, or top with crushed pretzels or caramel bits for crunch.
Coconut flakes and chopped nuts also add great texture. For a festive theme, use red, green, and gold sprinkles or edible glitter. Turning them into Oreo pops makes them a hit at parties and easy to gift. These treats can fit any theme — from Christmas platters to Valentine’s boxes or birthday favors.

Storage and Make-Ahead Tips
Store your chocolate-covered Oreos in an airtight container at room temperature for up to four weeks. If you used untempered chocolate or candy bars, refrigerate them to prevent melting. They travel well, making them perfect for gifting or sharing at cookie exchanges. For presentation, pack them in cellophane bags tied with ribbons or layer them in tins with parchment paper between layers.
Expert Tips for Best Results
Use high-quality melting wafers or candy melts for the smoothest coating. Always let the melted chocolate cool slightly before dipping so it adheres well and toppings stick properly. Work in small batches to keep your chocolate silky. Handle the cookies gently to avoid fingerprints and smudges, especially on white chocolate. Finally, if decorating, do it before the chocolate sets to lock in the sprinkles and drizzle cleanly.
Frequently Asked Questions
How long will chocolate covered Oreos last?
They’ll stay fresh for up to four weeks in an airtight container at room temperature.
How to dip Oreos in chocolate without a mold?
Use a fork to dip and flip each cookie in the melted chocolate. Let excess drip off before placing on parchment paper.
How much should I charge for 12 chocolate covered Oreos?
Prices vary by ingredients and packaging, but most home bakers charge between $12–$18 per dozen.
Other Recipes You May Enjoy
- Soft Gingerbread Cookies for the Holidays
- Red Velvet Blossoms for Christmas Cookie Trays
- The Best White Chocolate Peppermint Cheesecake
- Christmas Tree Cake Truffles: Festive No-Bake Treats
- Christmas Fudge Recipe for Sweet Gifting
- Cranberry Nut Bread: Classic Christmas Breakfast
Conclusion
These Chocolate Covered Oreos are everything you want in a Christmas treat — simple, festive, and delicious. They’re perfect for gift swaps, party platters, or just satisfying your sweet tooth while wrapping presents. Once you try them, they’ll become your go-to no-bake cookie for every holiday season.
For more holiday treat inspiration, follow me on Pinterest

Chocolate Covered Oreos
Equipment
- 2 microwave-safe bowls For melting white and milk chocolate separately.
- Forks For dipping and flipping the Oreos.
- Wax or parchment paper Prevents sticking while the cookies set.
Ingredients
- 12 Oreo cookies
- 8 oz white chocolate melting wafers
- 8 oz milk or dark chocolate melting wafers
- ¼ cup holiday sprinkles
Instructions
- Melt the white and milk chocolate wafers separately in microwave-safe bowls. Heat in 30-second intervals, stirring between each round until smooth.
- Dip each Oreo into the melted chocolate, flipping with a fork to coat evenly. Lift and let excess drip off before placing on wax paper.
- Let sit for 1–2 minutes, then add sprinkles or drizzle with extra chocolate. Allow to set at room temperature for 20–30 minutes or refrigerate for 10–15 minutes.
