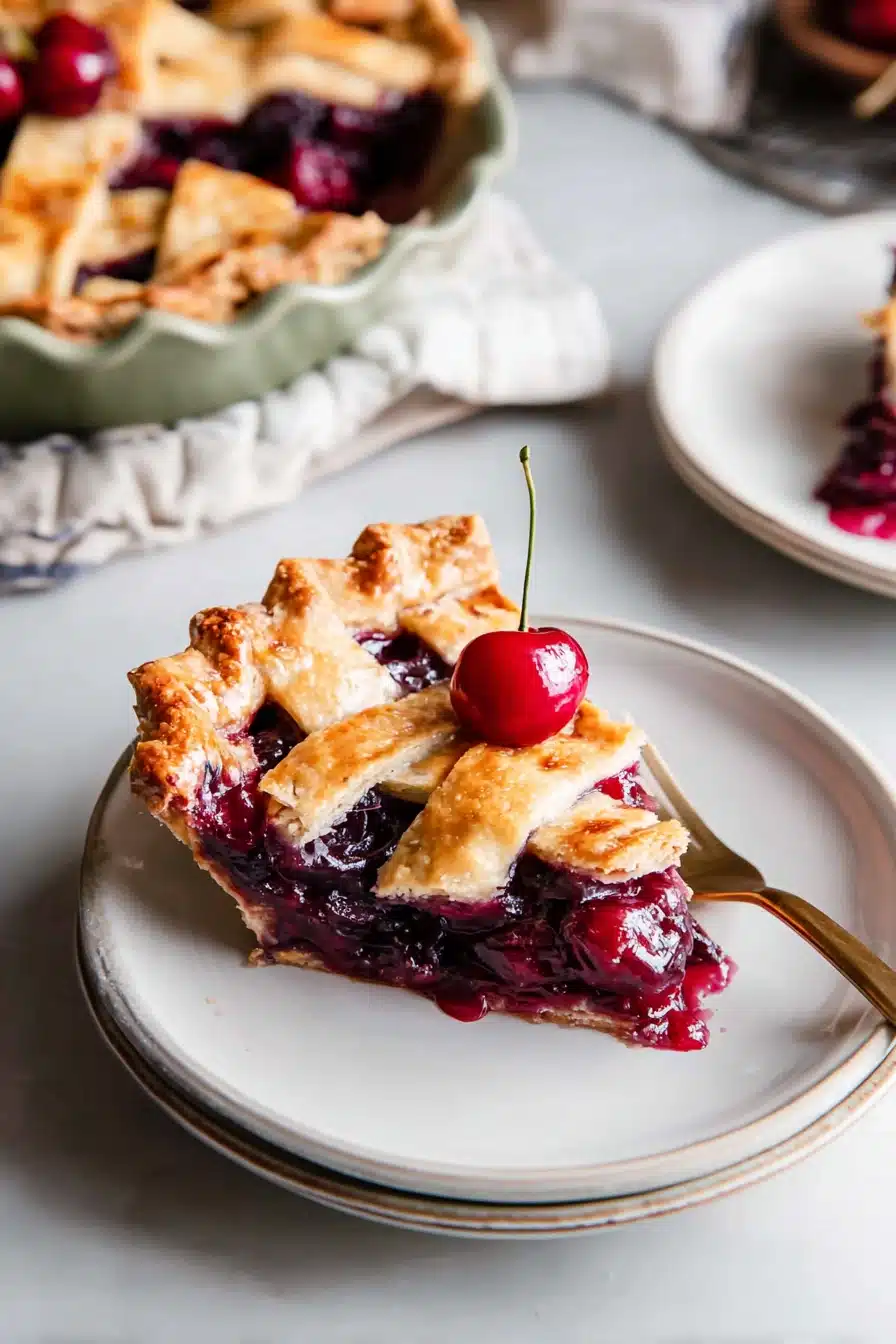
The best Cherry Pie is sweet, juicy, and wrapped in a golden, flaky crust that feels like pure comfort. Moreover, it uses simple pantry staples and fresh cherries, so you can bake a classic dessert that always impresses. If you love traditional cherry recipes, this one truly delivers.

Table of Contents
Why This Is the Best Cherry Pie Recipe
The best Cherry Pie stands out because it balances flavor, texture, and ease. First, the filling tastes bright and fruity. Then, the crust bakes up crisp and buttery. As a result, every slice looks beautiful and tastes even better.
I still remember pulling my first homemade cherry pie from the oven. Meanwhile, the kitchen smelled warm and sweet, and I could hardly wait to slice it. That same feeling comes back every time I bake The best Cherry Pie.
Perfectly Thickened Cherry Filling
A good pie needs structure. Therefore, this recipe uses cornstarch to thicken the juices as they boil.
Once the filling bubbles strongly in the oven, the cornstarch activates. As a result, The best Cherry Pie slices cleanly after cooling.
Flaky, All-Butter Homemade Pie Crust
The crust makes a huge difference. Because we use cold butter, small pockets form in the dough.
Then, as the pie bakes, those pockets melt and create flaky layers. In fact, that buttery flavor makes The best Cherry Pie unforgettable.
Balanced Sweetness for Sweet or Tart Cherries
Cherries can taste sweet or tart. However, this recipe adjusts easily.
If the fruit tastes tart, simply add more sugar. Therefore, The best Cherry Pie always tastes balanced and rich.
Fresh or Frozen Cherries Work Beautifully
Fresh cherries shine in summer. Meanwhile, frozen cherries help you bake year round.
As long as you thaw and drain them properly, The best Cherry Pie still turns out thick and flavorful.
Servings, Prep Time, and Cook Time
The best Cherry Pie serves 8 slices. Prep time takes about 45 minutes.
Meanwhile, bake time runs about 1 hour and 5 minutes. In addition, chill the pie for 20 minutes before baking. Total time comes to about 2 hours and 10 minutes.
Equipment You’ll Need
You need a 9 inch deep dish pie pan. Also grab mixing bowls, a rolling pin, and measuring tools.
If you have a cherry pitter, it helps. However, you can still manage without one.
How the Filling Thickens Properly
The filling thickens when it boils. Therefore, bake until you see strong bubbling in the center.
Once that happens, the cornstarch sets the juices. As a result, The best Cherry Pie holds its shape.
Ingredients for The Best Cherry Pie
Each ingredient plays a clear role. Together, they create The best Cherry Pie with rich flavor and a tender crust.
Cherry Pie Filling Ingredients
You need 6 cups sweet cherries, pitted and halved. Also add 2/3 cup granulated sugar and 1/3 cup cornstarch.
Then stir in 1 tablespoon lemon juice, 1 teaspoon vanilla extract, 1/4 teaspoon salt, and 1/4 teaspoon almond extract if desired. Finally, dot the filling with 1 tablespoon unsalted butter.
All-Butter Pie Crust Ingredients
For the crust, use 2 1/4 cups all purpose flour. Add 1 tablespoon granulated sugar and 1/2 teaspoon salt.
Next, cut in 1 cup cold unsalted butter. Then mix in 7 tablespoons ice cold water until the dough just comes together.
Egg Wash and Finishing Touches
Beat 1 egg with 1 tablespoon milk. Then brush it over the top crust.
After that, sprinkle coarse sugar if desired. This gives The best Cherry Pie a crisp, sparkling top.
Ingredient Notes and Substitutions
If using tart cherries, increase sugar to about 1 cup. However, taste first.
You can omit almond extract if needed. Also thaw frozen cherries fully and drain them well. Otherwise, the filling may turn too juicy.
How to Make The Best Cherry Pie Step by Step
Follow each step carefully. Then you will bake The best Cherry Pie with confidence.
Prepare the Cherry Filling
First, combine the cherries, sugar, cornstarch, lemon juice, vanilla, salt, and almond extract in a large bowl. Mix until evenly coated.
Meanwhile, let the mixture sit while you prepare the crust. As a result, the juices begin to release.
Make the All-Butter Pie Dough
In another bowl, mix flour, sugar, and salt. Then cut in cold butter until pea sized pieces form.
Next, add ice cold water gradually. Stir just until the dough comes together. Do not overmix.
Form the dough into a ball. Then divide it in half and shape into two disks. Chill one disk while you roll the other.
Roll Out and Fit the Bottom Crust
Roll one disk into a 12 inch circle. Carefully place it into a 9 inch deep dish pie pan.
Press it gently into the corners. Meanwhile, keep the second disk chilled so it stays firm.
Fill the Pie and Add Butter
Stir the cherry mixture again. Then pour it into the crust along with all accumulated juices.
Scatter small butter pieces over the top. This step adds richness as the pie bakes.
Add the Top Crust or Lattice
Roll out the second disk. You can lay it whole on top or weave a lattice.
Trim excess dough. Then fold edges under and crimp to seal.

Egg Wash and Chill Before Baking
Beat the egg with milk. Then brush it evenly over the top crust.
Sprinkle sugar if desired. After that, refrigerate the assembled pie for 20 minutes while you preheat the oven to 400°F.
Bake Until Golden and Bubbling
Place the pie on a lower oven rack. Bake at 400°F for 20 minutes.
Then reduce heat to 350°F and continue baking for 40 to 50 minutes. Bake until the filling bubbles vigorously and the crust turns golden.
If the crust browns too quickly, loosely cover it with foil.
Cool Completely Before Slicing
Let The best Cherry Pie cool for at least 3 hours.
Although slicing early feels tempting, cooling allows the filling to set properly. As a result, you get clean slices.
How to Pit Cherries Easily
Pitting cherries takes time. However, it becomes easier with the right method.
Using a Cherry Pitter
A cherry pitter works quickly and keeps juices contained. Simply place the cherry inside and press.
As a result, the pit pops out neatly.
Pitting Without Special Tools
If you do not own a pitter, use a sturdy straw or chopstick. Push it through the stem end.
Then remove the pit by hand. It may feel messy, yet it works well.
Baking Tips for a Perfect Cherry Pie
Small details improve The best Cherry Pie every time.
How to Prevent a Runny Filling
Always bake until the center bubbles strongly. Otherwise, the cornstarch will not fully thicken.
Also allow the pie to cool completely. Patience makes a difference.
How to Keep the Crust from Over Browning
If edges brown too quickly, cover them loosely with foil.
Meanwhile, let the center continue baking so the filling thickens fully.
Adjusting Sugar for Tart Cherries
Taste your cherries first. If they taste tart, increase the sugar gradually.
Then stir well so sweetness spreads evenly.
Getting a Crisp Bottom Crust
Bake on a lower rack. This helps the bottom cook thoroughly.
Also avoid adding extra liquid to the filling. Proper draining keeps the crust crisp.
Using Frozen Cherries
Frozen fruit works well in The best Cherry Pie.
How to Thaw Frozen Cherries Properly
Place frozen cherries in a colander. Let them thaw completely in the refrigerator.
Meanwhile, allow excess juices to drain away.
Managing Extra Juices
If the cherries look very juicy, stir gently before measuring.
However, do not add extra liquid beyond the recipe.
Storage, Make-Ahead, and Freezing Instructions
The best Cherry Pie stores well, so you can plan ahead.
Storing at Room Temperature or in the Refrigerator
Keep the baked pie at room temperature for up to 8 hours. After that, refrigerate up to 3 days, covered.
Freezing a Baked Cherry Pie
You can freeze a fully baked pie for up to 3 months. First cool it completely.
Then wrap tightly and freeze. Thaw in the refrigerator for 24 hours before serving.
Freezing Pie Dough in Advance
Prepare the dough ahead of time. Store it in the refrigerator for up to 4 days.
You can also freeze it for up to 3 months. Thaw overnight before rolling.
Freezing Cherry Pie Filling
Place prepared filling in an airtight container. Then freeze for up to 3 months.
Later thaw and bake as directed for The best Cherry Pie.
Serving Suggestions
Serving The best Cherry Pie always feels special.
Classic Pairings Like Vanilla Ice Cream
Serve slightly warm with vanilla ice cream. Meanwhile, watch it melt into the cherry filling.
Whipped cream also tastes wonderful on top.
How to Slice for Clean Pieces
Use a sharp knife. Wipe it clean between cuts.
Then slice slowly for neat portions.
Frequently Asked Questions
What makes a good cherry pie?
A good pie has balanced sweetness, a thick filling, and a flaky crust. Also proper baking and cooling create clean slices.
What is the secret to a perfect pie filling?
The secret lies in letting the filling bubble fully in the oven. As a result, cornstarch thickens the juices properly.
Is cherry pie best warm or cold?
Many people prefer it slightly warm. However, it slices best at room temperature after cooling.
How long can cherry pie stay unrefrigerated?
Cherry pie can stay at room temperature for about 8 hours. After that, refrigerate it.
Other Recipes You May Enjoy
- No-Bake Cherry Dessert with Creamy Layers
- Cherry Bread Recipe That’s Sweet, Moist, and Easy
- Cherry Cobbler Muffins – Easy, Sweet, and Irresistible
- Cherry Dump Cake – Simple, Gooey, Ultimate Dessert
- Cherry Amaretto Tiramisu No-Bake Dessert
- Chocolate Cherry Smoothie Bowl Amazing Easy Treat
Final Thoughts
The best Cherry Pie brings comfort, flavor, and a touch of nostalgia to your table. Although it takes time, each step feels simple and rewarding. Once you bake it, you will understand why so many families treasure this classic dessert. For more baking inspiration and cherry recipes, you can also follow along at pinterest.

The Best Cherry Pie
Equipment
- 9 inch deep dish pie pan
- Mixing bowls
- Rolling Pin
Ingredients
- 6 cups sweet cherries, pitted and halved
- ⅔ cup granulated sugar
- ⅓ cup cornstarch
- 1 tablespoon lemon juice
- 1 teaspoon vanilla extract
- ¼ teaspoon salt
- ¼ teaspoon almond extract (optional)
- 1 tablespoon unsalted butter, cut into small pieces
- 2 ¼ cups all purpose flour
- 1 tablespoon granulated sugar for crust
- ½ teaspoon salt for crust
- 1 cup cold unsalted butter, cubed
- 7 tablespoons ice cold water
- 1 egg
- 1 tablespoon milk
- coarse sugar for sprinkling (optional)
Instructions
- In a large bowl, combine cherries, sugar, cornstarch, lemon juice, vanilla, salt, and almond extract. Mix well and let sit while preparing the crust.
- Mix flour, sugar, and salt. Cut in cold butter until pea sized pieces form. Add ice cold water and mix just until dough comes together. Divide into two disks and chill one.
- Roll one disk into a 12 inch circle and fit into a 9 inch deep dish pie pan.
- Stir filling again and pour into crust with all juices. Scatter butter pieces over top.
- Roll out remaining dough and place over pie or create a lattice. Trim, fold edges under, and crimp to seal.
- Beat egg with milk and brush over crust. Sprinkle with sugar if desired. Refrigerate 20 minutes while preheating oven to 400°F.
- Bake at 400°F for 20 minutes on a lower rack. Reduce heat to 350°F and bake 40 to 50 minutes more until filling bubbles vigorously and crust is golden. Cover edges with foil if browning too quickly.
- Cool pie at least 3 hours before slicing to allow filling to set properly.